
Intro
In the previous part I explained how to set up Jenkins and how to run a simple free-style job to build a Unity3D project. This works fine for all Unity3D projects that don’t require any additional steps after the Unity build step has finished (e.g. Standalone and Android builds). If you are targeting iOS or tvOS, you need to add an additional step to build and package the application, making it a deployable app package.
In this part of the series I am going to describe the integration of the Xcode build step into a Jenkins free-style job. You will be able to build a Xcode project and export a so called *.ipa file. An ipa file is an iOS archive which packages the actual iOS application into a deployable package. When signed correctly the ipa file can be transferred to an iOS device using e.g. iTunes or Testflight.
Preparing Xcode
If not already done install Xcode from the OS X App Store. Once you have installed Xcode start it at least once. This will install some additional mandatory Xcode components. Additionally you will need to install the Xcode command line developer tools. The command line tools enable Jenkins to perform Xcode builds, and then package and sign apps in headless mode. You’ll find them here: Command Line Tools. To download them you’ll need an Apple Developer Account. If not already done create one. This is necessary anyway to be able to sign and deploy apps to the App Store.
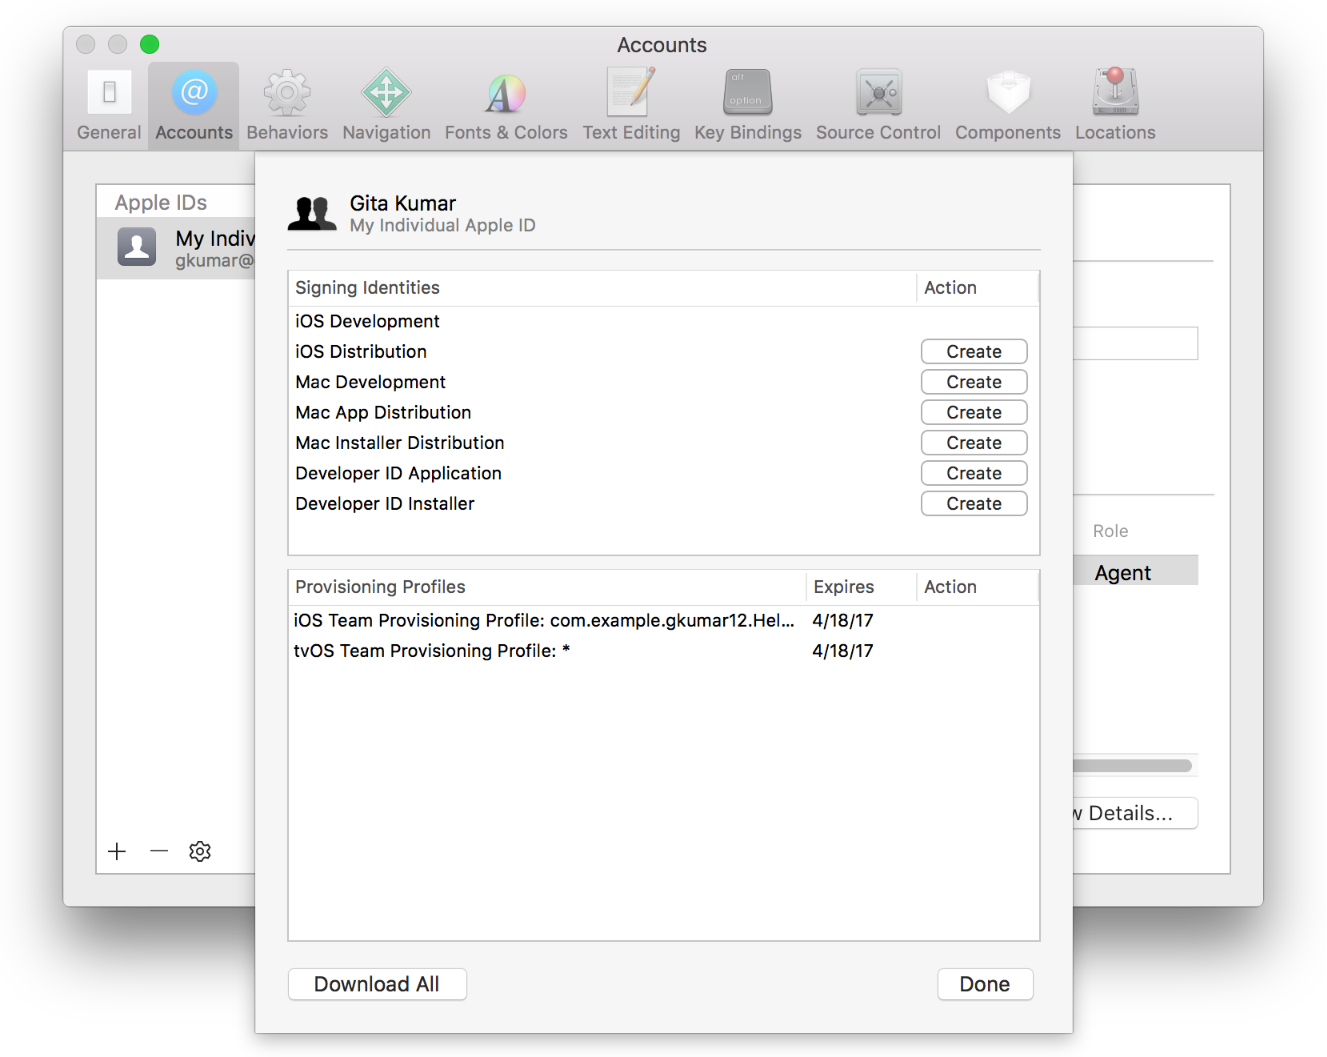
Before being able to package an app you have to create a developer certificate and provisioning profiles for your app. Use the Apple Developer Member Center to create new app IDs, provisioning profiles or upload new developer certificates. Here is a guide on how to create, install and maintain developer certificates and provisioning profiles of your Apple Developer Account.
Preparing Jenkins
If not already done, install the latest version of the Jenkins Xcode plugin. In Jenkins go to Manage Jenkins -> Manage Plugins. Switch to the Available tab and search for Xcode. Install the resulting Xcode integration plugin.
Now it’s time to set up some global settings for Xcode. Go to Manage Jenkins -> Global Configuration. Scroll to the Xcode settings and check if the following settings are correct:

Newer versions of the Xcode integration plugin require a list of available development teams to sign ipa files with a provisioning profile. Therefore you need to add at least one Apple Development Team, specifying a Jenkins internal name and the Team ID:

The last thing you need to set up is the default keychain that should be unlocked to perform the signing:
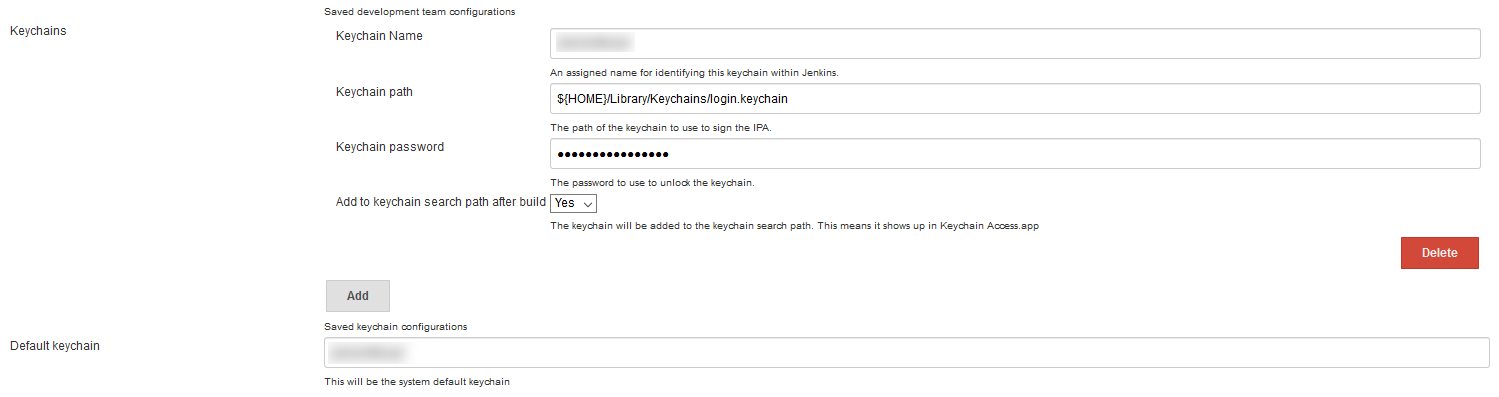
Specify a Jenkins internal name for your keychain, the keychain path and the password. By default this will be your logged in OS X user.
Changing the Build Job
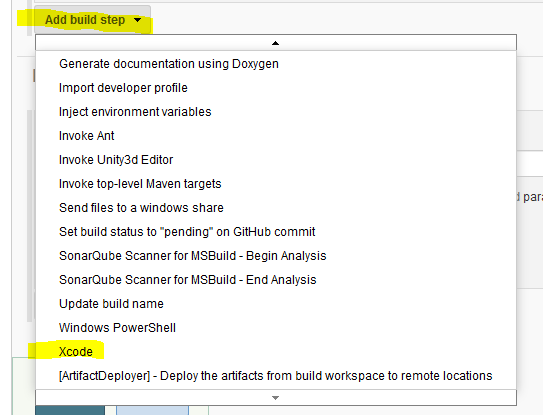
The first thing you need to do is to add a new Xcode build step into the existing Jenkins job. Add it after the Unity3D build step:
Once the build step is added, use the following general build settings:
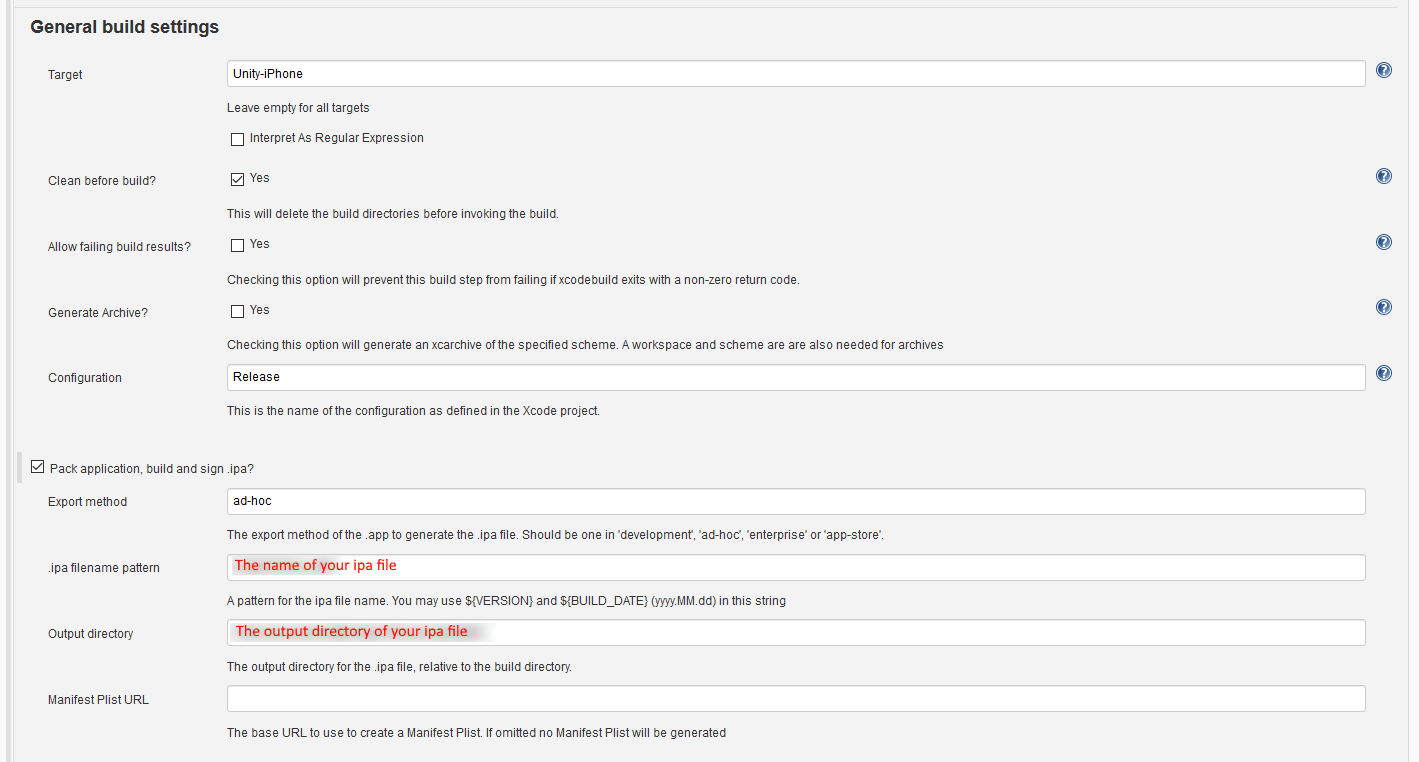
Specify the target ipa name and the target output location for your ipa file. Define the export method with ad-hoc for Ad-Hoc signed builds and app-store for builds that are deployed into the App Store or Testflight.
In the next section select the development team you added in the Global Configuration for Xcode and the keychain to unlock:
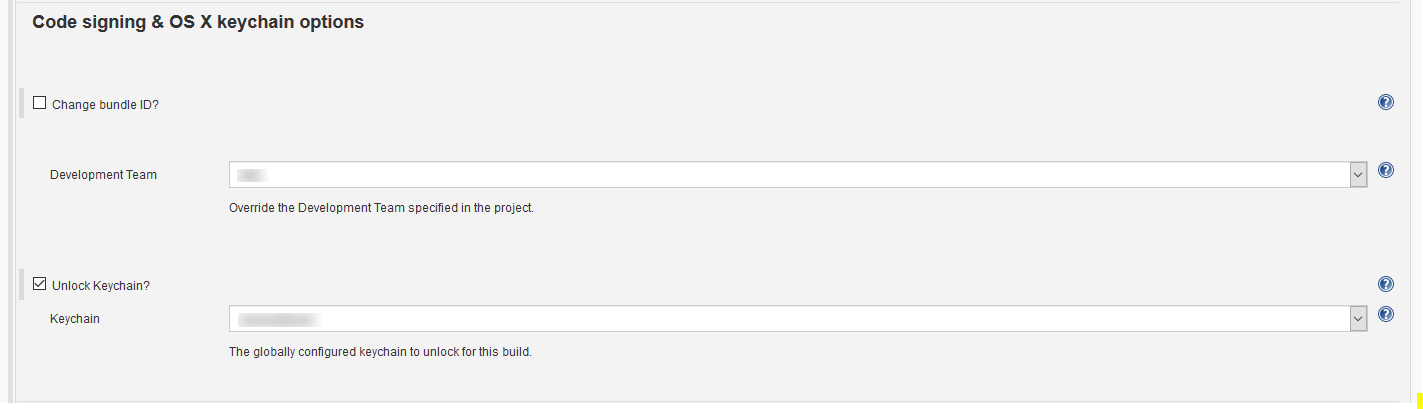
Please make sure you’ve installed all needed provisioning profiles and developer certificates on your build machine.
Next specify the Xcode project to build. Use the following settings:
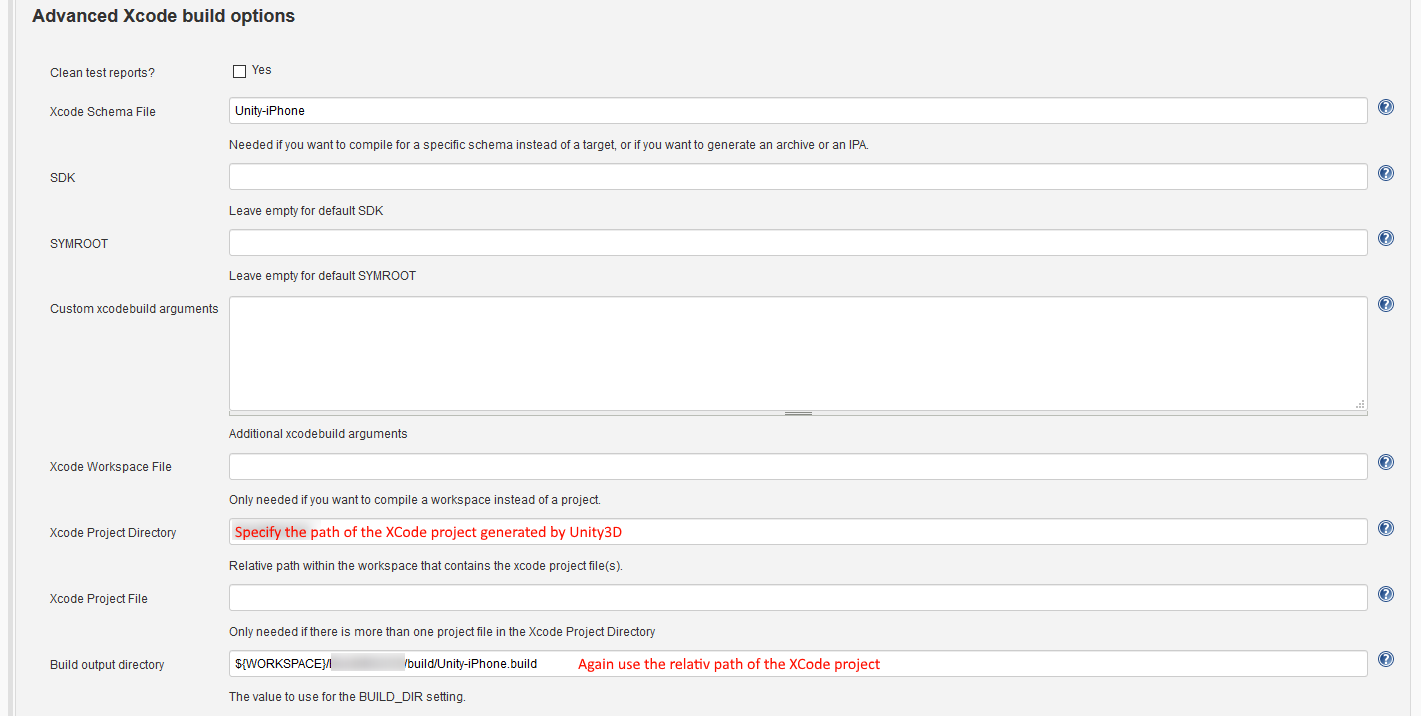
The latest version of the Xcode integration plugin does not use xcrun to package apps. Instead is uses xcodebuild. Therefore you have to define the Xcode scheme file. The default for Unity3D projects is Unity-iPhone. The Xcode project directory is the path of the Xcode project exported by Unity3D relative to the workspace directory. The build output directory is the same as the project directory prefixed with the ${WORSPACE} environment variable and postfixed with build/Unity-iPhone.build.
From this point on you are able to create an ipa file with your Jenkins build job.
Multiple Versions of Xcode
Some of our projects at it Matters Games only support an older version of Unity3D. Unfortunately, the latest version of Xcode is not compatible with those. Therefore, we have to install multiple versions of Xcode on our build machine and add a pre-selection to the build job. This can be achieved by changing the developer directory environment variable before performing the Xcode build step. Jenkins has the possibility to inject variables into the build process. By injecting a new path to the DEVELOPER_DIR variable a different version of Xcode will be used:

We have two installations of Xcode: the latest version of Xcode 8 and Xcode 7. If both versions are installed in separate application folders, like let’s say Applications/Xcode8 and Applications/Xcode7, you can use the following content for the Properties Content field to select the target version of Xcode:
DEVELOPER_DIR=/Applications/Xcode8.app/Contents/Developer
DEVELOPER_DIR=/Applications/Xcode7.app/Contents/Developer
Abstract and Outlook
Automatically performing a XCode build step creating an ipa file for deployment is a big step forward in Unity3D iOS development. We have projects where we need to create builds for multiple versions of a game a couple of times per day. Performing builds manually can block a developer for hours. Using Jenkins saves a lot of time and adds real value to the development of any project. Furthermore, all of your employees and clients are able to deploy and test build results of your Jenkins jobs very easily.
If you are working on multiple projects in parallel your number of builds will probably also increase. Depending on the size of your projects each Unity3D build can take a couple of minutes. This will lead to the point were your build pipeline will be blocked by the pure number of builds. To avoid long waiting times one can add so called slave nodes to Jenkins. In the third part of this series I will explain how to add additional Windows and OS X slaves to the CI pipeline, increasing the number of builds that can be performed in parallel.