
Introduction
For smaller game companies it is fairly common to work on multiple game projects at the same time. Utilizing Continuous Integration for multiple projects with each targeting multiple platforms can result in an increased number of builds.
In this post I am going to describe a way to decrease waiting times by adding additional so called slave nodes to Jenkins. Jenkins uses a “master/slave” mode in which the workload of build jobs is delegated to different slave nodes.
Jenkins Slave Nodes
Slave nodes are computers that offload build jobs from the Jenkins master. Once the slave is setup Jenkins handles the delegation of work fairly automatically. Each job can specify how the delegation behaves. Jobs can be bound to a specific slave, while some may roam freely between slave nodes. Each slave is setup as a so called “slave agent”. Therefore there is no need to install Jenkins on the slave computers. There are different ways to set up a slave, but in the end the master and the slave establish a bi-directional communication. The next sections will explain how to add slave agents using a windows or OSX computer. Keep in mind that your computers need to have a logged-in user with access to the windowsserver (OSX) or the graphical desktop (Windows) if you want to perform Unity builds.
Windows Slave Agents
First you need to add a new slave agent in Jenkins.
- Go to Manage Jenkins -> Manage Nodes -> Add New Node.
- Create a new node of type Dumb.
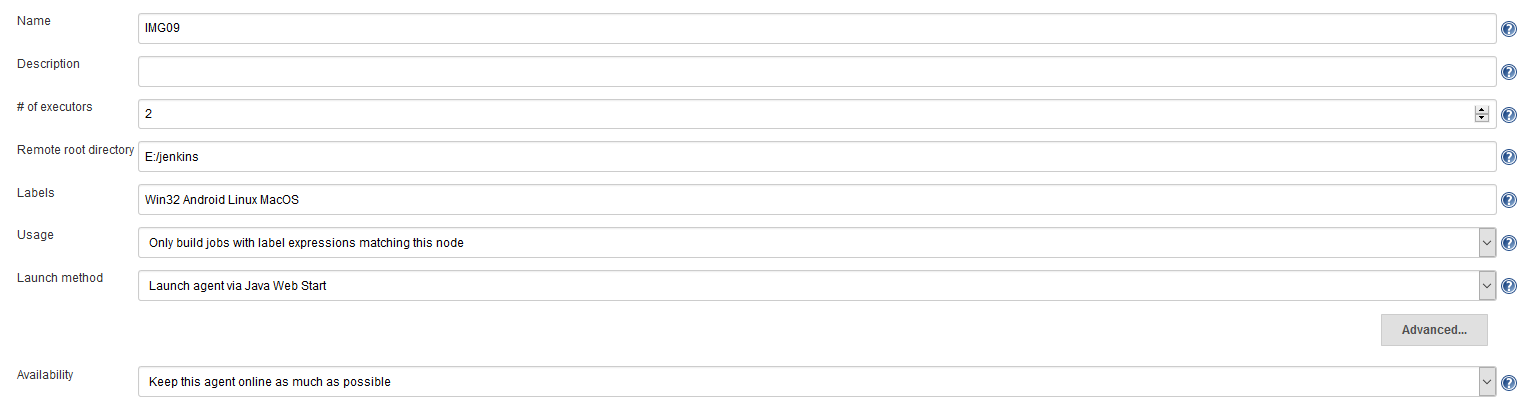
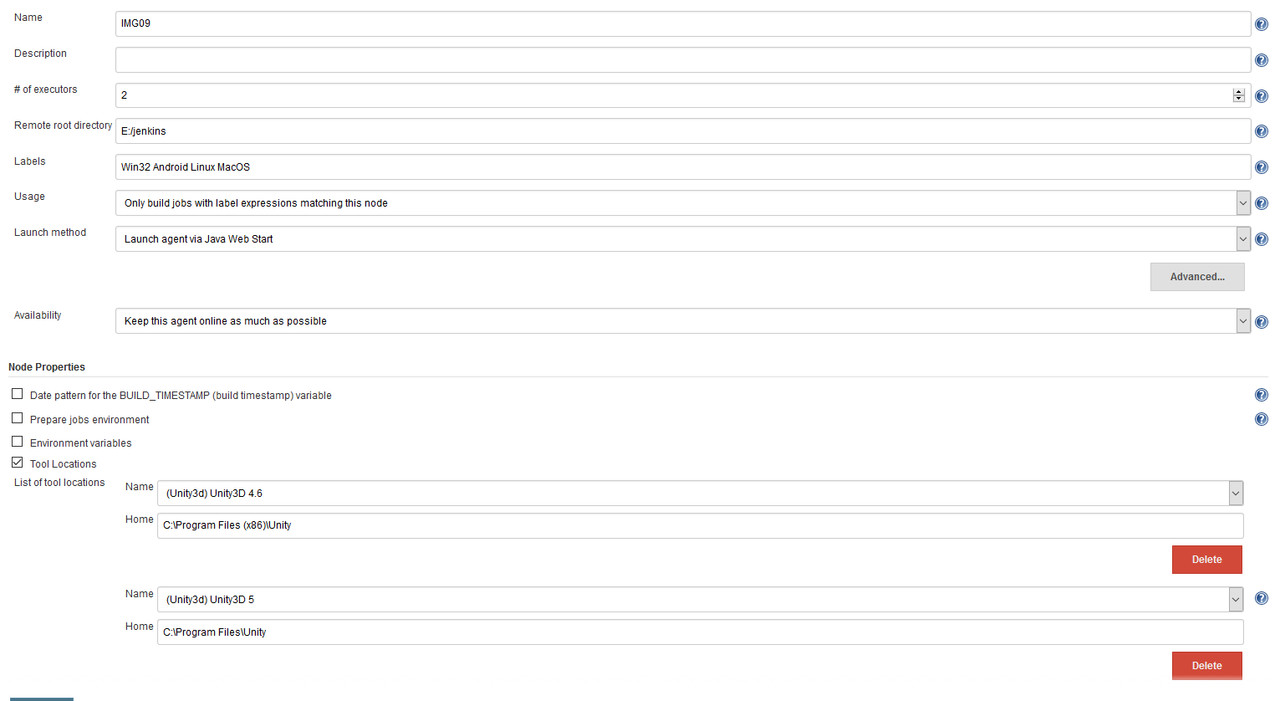
- Set the slave name to something like the target computers name.
- You can specify a label for the slave that can be used to bind Jenkins jobs to slaves with a specific label. For example: iOS, Android, Win32 etc.
- Set the target base directory for the slave agent executable to be installed. That will also be the location of the slaves local Jenkins work spaces.
- Set the slave to start via JNLP.
Now its time to setup the Jenkins slave agent.
- On the target machine open the following url: http://<jenkins-ip-and-port>/computer/<slave-name>/slave-agent.jnlp.
- Download the jnlp file and open it. It might be necessary to update Java before being able to run the application.
- Once the jnlp is opened, click on File -> Install Jenkins as a Service.
- Now the slave agent is up and running, but it does not have access to the graphic card. Go to Services -> Jenkins Slave -> Properties -> Log On. Check Allow service to interact with desktop and enter a credentials of the default computers user.
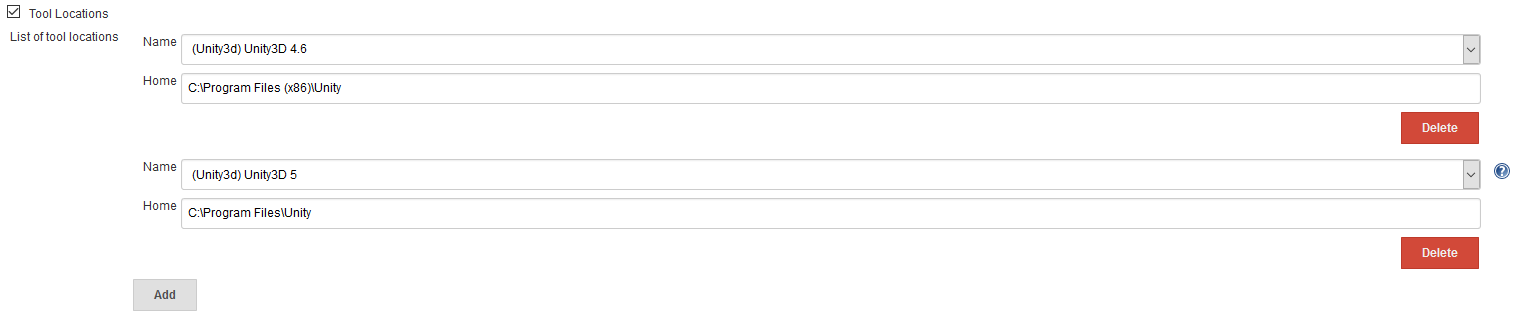
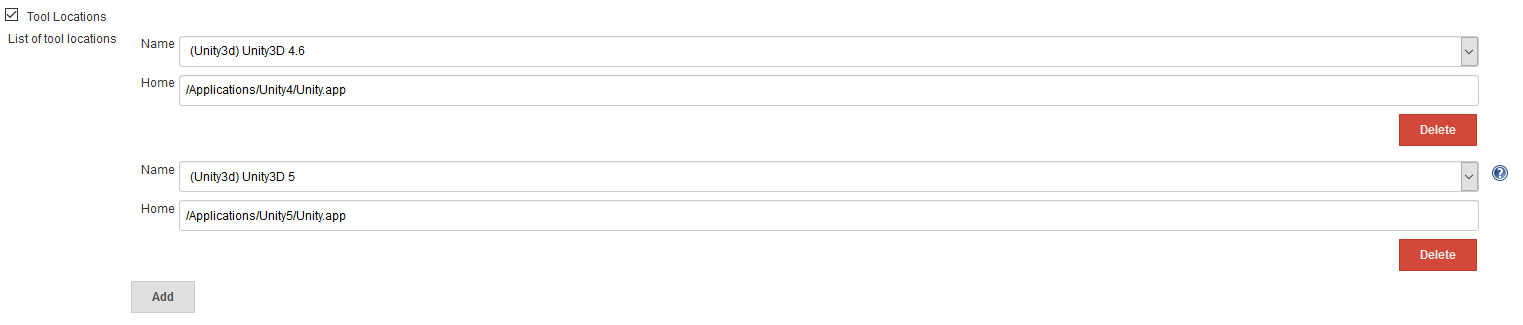
The Jenkins agent is now started automatically when the user logs into windows. If you want you can setup wake-on-lan and let the user login automatically once the computer is started. The last thing you need to do is install Unity3D on your slave agents. After that you’ll have to specify the Unity3D installations location in the Jenkins agent settings.
OSX Slave Agents
Adding an OSX slave is a bit more complicated than adding a Windows slave node. The master and the slave will have to communicate using ssh. Jenkins already has a built-in SSH client that it uses to communicate with a remote sshd and start a slave agent. The creation of a new OSX slave node is basically the same as for Windows. As Launch Method however you need to chose Launch slave agents via SSH. Provide the IP address of the target slave computer and the ssh credentials.

The slave will need the master’s public ssh key copied to ~/.ssh/authorized_keys. This removes the need of having to enter the slave’s account details to connect via ssh. On the Jenkins master we need to create a private/public pair of authorization keys. Open the terminal on the master and generate a new key:
ssh-keygen -t rsa
Do not enter a passphrase.
Copy the public key to the slave’s agents ssh folder:
cat .ssh/id_rsa.pub | ssh &amp;lt;user-of-your-osx-slave&amp;gt;@&amp;lt;ip-of-your-osx-slave&amp;gt; 'cat &amp;gt;&amp;gt; .ssh/authorized_keys'
From now on you can log into your slave as the slaves user from the Jenkins master without a password.
Abstract and Outlook
If everything is setup correctly you have a very powerful automation and build pipeline for all your Unity3D projects. By letting your pipelines run automatically every time a developer commits or just in regular intervals a couple of times per day, you reduce the probability of build or compile errors being undetected for a longer time. Adding a stop-and-fix mentality once a build fails will leave your repository in a state that is always build-, deploy- and presentable to your stakeholders. Continuous integration will add real business value to your company and increase your reputation as a professional game development company.