

Introduction
Jenkins is a Continuous Integration and automation server. It is an open-source and a web-based application written in Java, which can be installed on any platform that supports the Java Runtime. With the addition of hundreds of plugins Jenkins can be used to automate Continuous Integration tasks for many programming languages. Here at it Matters Games we are using Jenkins to automatically build all of our Unity3D based game projects and the Doxygen code documentation. Even for smaller companies and projects you can’t neglect the advantage of having a centralized place to keep all your build configurations, automate your builds and tests, and store all build results.
This is the first part of a series that will explain in detail:
- How to set up a Jenkins server
- How to perform Unity3D builds
- How to integrate Xcode
- How to add additional slave nodes to perform builds in parallel
In this post I will describe what hardware you need, how to set up a so called Jenkins Master Server and how to run your first build job for a Unity3D project.
The Basic Setup
- Even if you can install Jenkins on a Windows or Linux machine, I recommend using OS X.
- You should install a fast hard drive, e.g. an SSD.
- Make sure your master has enough storage; we are using a minimum of 512GB to be able to store all build job workspaces and the build artifacts. 8GB of memory should be enough for building Unity3D projects.
- You need at least OS X 10.8; we were unable to install the latest version of Jenkins on an older version of OS X. Older versions do not support the latest Java SDK. If your are targeting the latest iOS Version 10.3 you will need to install OS X 10.12 (Sierra) anyways.
- It might be reasonable to use a so called Hackintosh (a regular PC with OS X installed). Jenkins and Unity3D work absolutely fine on a Hackintosh (Details on how to set up a Hackintosh can be found here). However, please note that installing OS X an a different computer than a Mac violates the Apple terms of condition.
Once you have your machine up and running you need the following things:
- The Jenkins install package
- An OS X user (best the default one)
- The latest Java SDK being installed
- The latest version of Git (only needed if Git is used as SCM)
- Unity3D (versions prior to Unity3D 5 need a pro license to execute command line builds, newer versions don’t)
- Xcode (if you target iOS platforms)
After finishing installing Jenkins you can open http://localhost:8080 in Safari. Unfortunately, as we are going to use Jenkins with Unity3D we have to change the out of the box Jenkins setup. Unity3D needs to be started with a user that has access to the OS X windowserver. To be able to do so, Jenkins has to run as a LaunchAgent with a logged-in user.
First you need to stop Jenkins. Open the Terminal and enter the following command:
sudo launchctl unload /Library/LaunchDaemons/org.jenkins-ci.plist
Move the Jenkins LaunchDaemon to LaunchAgents
sudo mv /Library/LaunchDaemons/org.jenkins-ci.plist /Library/LaunchAgents/org.jenkins-ci.plist
No we have to change the default user for the LaunchAgent:
sudo vi /Library/LaunchAgents/org.jenkins-ci.plist
Find the part that looks like this:
<key>UserName</key>
<string>Jenkins</string>
And change it to this:
<key>UserName</key>
<string>whatever-username-your-logged-in-account-has</string>
You need access to the Jenkins work (home) directory:
cd /Users/Shared/Jenkins/
sudo chown -R your_logged_in_username .
Since OS X Yosemite there is a new log rotation system. You have to give your user access to var/log/jenkins:
sudo chown -R your_logged_in_username: /var/log/jenkins
As it seems, this step has to be repeated every time you update the major version of OS X.
Edit the log rotation:
sudo nano /etc/newsyslog.d/jenkins.conf
Change the following line to accordingly:
/var/log/jenkins/jenkins .log your_logged_in_username:jenkins 644 3 * $D0 J
Now save the file and restart Jenkins with the following command:
sudo launchctl load /Library/LaunchAgents/org.jenkins-ci.plist
Now Jenkins should be running using your logged-in user which has access to the windowserver. Open http://localhost:8080 in Safari.
Installing Plugins
You’ll need to install the Unity3d plugin to be able to perform Unity3D builds with Jenkins. This plugin makes it very easy to use Unity3D installations as a build step in Jenkins jobs.
Inside Jenkins go to Manage Jenkins → Manage Plugins → Available. Search for “Unity” and install the resulting plugin. As we are already here, we should install some more useful plugins.
- Xcode integration is used to target iOS and tvOS platforms
- Environment Injector Plugin is used to switch between different Xcode installations on the system (only needed if you really target different Xcode installation)
- Folders Plugin makes it very convenient to organize jobs into sub-folders
- iOS Device connector plugin and Android Device connector plugin enable you to deploy *.ipa and *.apk application packages directly to a connected device
- Slack Notification Plugin lets you notify build results to a slack channel
- ThinBackup comes in very handy when you want to backup or restore all Jenkins settings and all jobs
Once you are done installing the plugins Jenkins might have to restart. The following links can be used to restart or shutdown Jenkins manually:
http://localhost:8080/exit
http://localhost:8080/restart
http://localhost:8080/reload
Setup Unity3D for Jenkins
Your Unity3D installation should be set up correctly on each Jenkins instance. For example if you target Android platforms you should install the latest Android SDK and point the Unity3D Editor to it. If you target iOS platforms, then Xcode should be installed properly. Once everything is in place, you have to add your Unity3D installation to Jenkins.
In Jenkins go to Manage Jenkins → Configure System. The Unity3D Jenkins plugin has added a new tool entry to Jenkins. Add a new Unity3D installation which points to your Unity3D Editor location in OS X Applications.
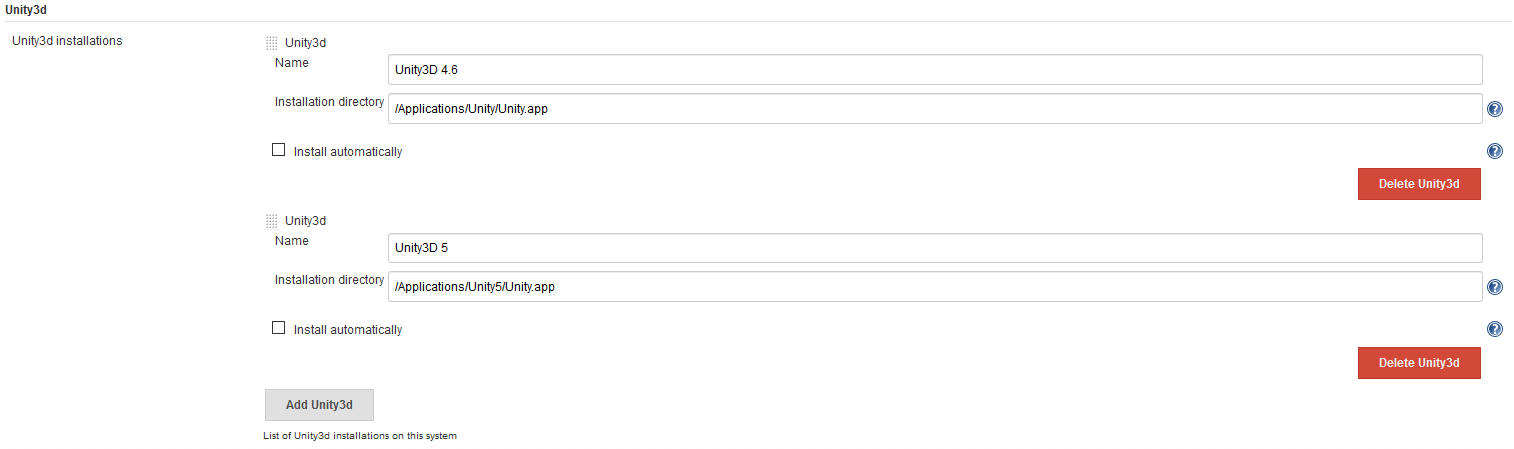
Jenkins Unity3D installations
Create Your First Build Job
Now that you have everything set up and in place it is time to create your first build job. In the Jenkins sidebar click on New Item. Select Freestyle Project and give the job a name. A page opens with your jobs configuration. The first thing to do is to set up your source code management.
If you are using a SVN enter the repository URL and your SVN credentials. We had some trouble checking out from SVN repositories that included externals. For some reason adding the same credentials twice as additional credentials resolved the issue.

Build job SVN setup
For Git it is basically the same. Enter your Git URL and set up the Git credentials for your repository:
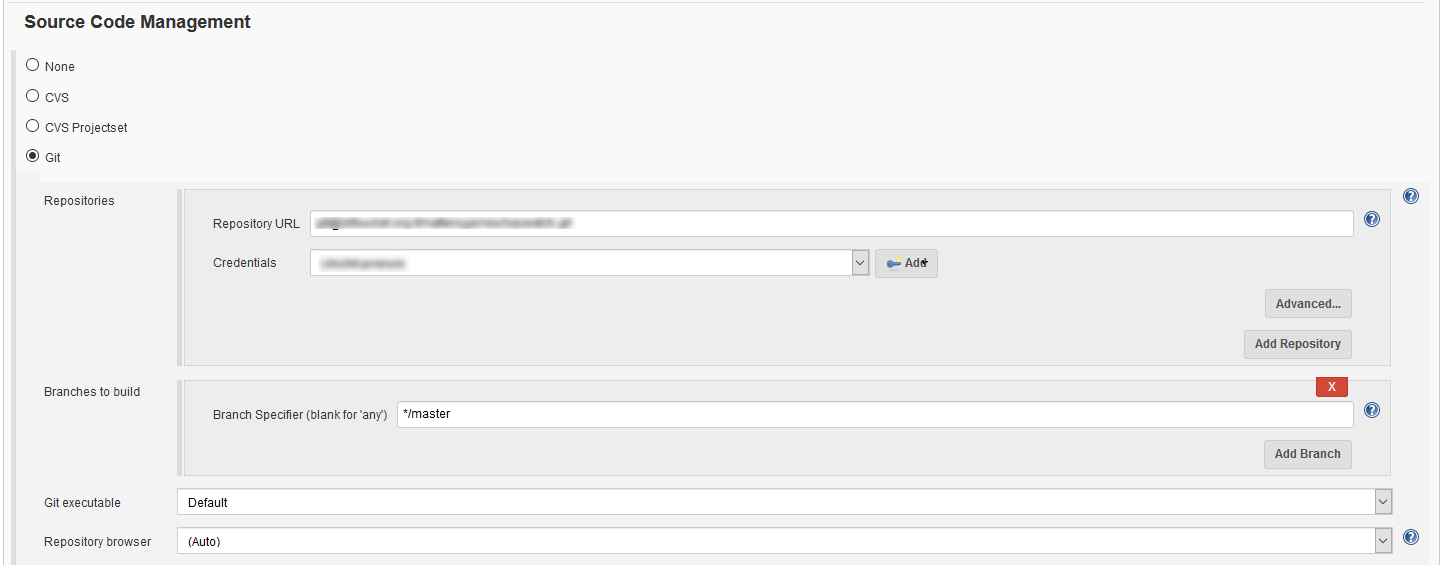
Build job Git setup
You might run into some trouble if your Git repositories are using sub-modules. Due to an issue in the Git plugin, credentials are not forwarded when pulling sub-modules. There is a way of logging into your Git remote server using a ssh connection with a private/public key. But this will be the topic of a future post.
Once you have your source code management settings entered correctly, it is time to add the actual build step. Scroll down and click Add Build Step, then choose Invoke Unity Editor. Select your target Unity3D installation and use the following command line to execute the Unity build:

Unity3D build step
-quit -batchmode -executeMethod PerformBuild -nographics
You need to have a script in an Editor folder of your Unity3D project and a static function in that class to use -executeMethod:
// C# example
using UnityEditor;
class MyEditorScript
{
     static void PerformBuild ()
     {
         string[] scenes = { "Assets/MyScene.unity" };
         BuildPipeline.BuildPlayer(scenes, ...);
     }
}
More details on that can be found here.
Save the job configuration. Now it’s time to run your first build job: just click the Build Now button in the jobs sidebar. Jenkins will now check out your projects source code from the configured SCM repository. After that the Unity command line is executed. If your PerformBuild method is set up correctly you will get the build artifacts inside the job’s workspace.
Abstract and Outlook
You now have a Jenkins master server up and running. The server starts automatically when the Mac starts up and the user logs in. You should automate that process using e.g. “wake on lan” or something like that. The default OS X user should also log in automatically.
In the next part of this series I’m going to describe how to build iOS projects that will create an ipa package which can be directly deployed onto a device, to Testflight or to the Apple App Store.